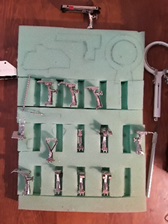
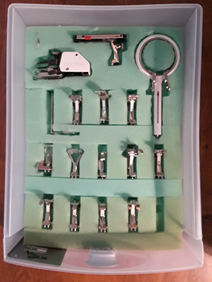
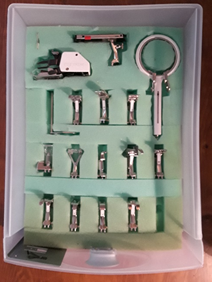
Need an idea on how to reorganize your collection of sewing machine presser feet?
This post is in response to LaDonna’s request for more information on how I made my custom storage for sewing machine presser feet that was mentioned in my post on sewing room organization.
The original accessory box containing that came with my sewing machine had no space for additional specialty feet. During one of my sewing room reorganizations, I decided to create a better, and bigger storage space for sewing machine accessories using a small plastic three drawer case.
One drawer would be for thread bobbins and one for presser feet. For each drawers, I cut 1” thick foam to fit in the bottom of each and spaces cut to fit bobbins and feet.
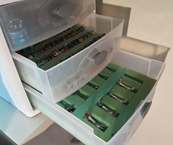
It has been several years since I made the foam organizers for bobbins and feet, so I had to go back and take a good look at them to remember how they were made.
For the bobbins, it was easy to cut channels in the piece of foam to hold the bobbins. All I had to do was cut parallel straight lines in the foam at about ½” depth with a craft knife, then fold the foam so that the piece that needed to be cut out for the channel popped up and I could easily use a pair of scissors to cut the strip out.
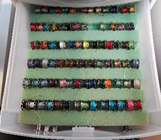
Okay, I know this post is about making a foam drawer insert for presser feet, but it is the same idea, just a little more attention to detail. Just wait and see.
For the presser feet, I tried cutting out individual rectangular indentations in a single piece of foam, but that was frustrating with messy results that was not worth completing. I had to rethink the process, and go back to what I already knew worked- the channels for the bobbins.
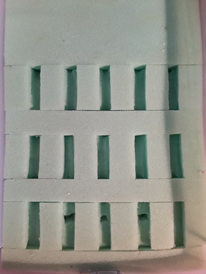
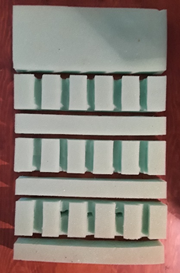
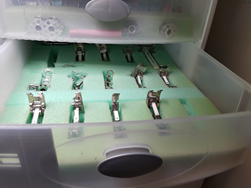
The new design for the presser feet drawer insert is really one piece cut into several pieces. Pieces that are cut in channels like the one for bobbins alternating with blank spacers between them. In the picture on the left, you can see the whole insert with the pieces pushed together and in the picture on the right you can see what it looks like when pulled apart to show the separate pieces. fortunately, I never glued the pieces together, making it easy to take apart.
When I went back to see how I had made the insert for the presser feet, that is when I realized it needed a little improving to finish making the spaces a better fit for some pieces and create spaces for several others. As you can see, the closeup of the foot on the right of the first row at the drawer front shows how it just does not fit in the generic rectangular space. Later, when rearranging the feet, it gets assigned a new permanent space, adjusted to fit it.


I decided that showing how I altered the existing spaces would help explain how the spaces were originally made.
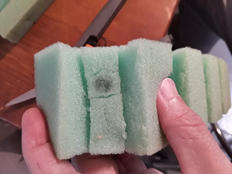
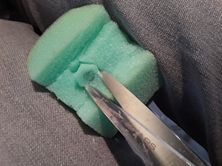
The following two pictures show how an indentation was added to a channel to accommodate the thumbscrew that sticks out the back of many of the feet. This little cutout in the channel allows the foot to rest in the space better.
For some, the rectangular channel space was extended to fit the shape of the foot better and for the larger pieces, new spaces had to be made.
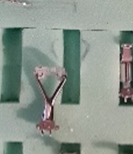
The next two pictures show marking and altering the foam for the awkward shaped feet that extend beyond a rectangular channel. The first picture shows a foot next to its space. This is the same one shown above in a closeup photo.
While in its space, the sides where it flares out beyond the space was traced with the pen. The second picture reshaping the space by cutting out the marked areas.
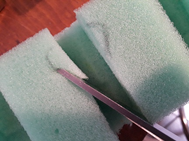
The larger attachments never had their own spaces; they just got shoved in the blank spot in the back of the drawer. So, spaces were carved and snipped out for them. First, the large parts in the back were neatly arranged where they probably would get spaces marked and cut to fit them. You can see I changed my mind and rearranged a tiny bit. Then, the pieces were traced using a ballpoint pen. And, finally, a combination of craft knife and scissors were used to hollow out the spaces. The cut out spaces are not pretty, but functional.
The feet look like they are upside down in the drawers and they are, for a reason. I find it easier to identify which foot I want to select by seeing the tops rather than the soles of the feet. And, the order they are in is just personal preference based on frequency of ones I am most likely to use being placed towards the front.
Thank you LaDonna for inspiring me to share about how I made the presser feet organizer and to finish what I started.

